1 min to read
Amazon EC2 Jenkins plugin
Launch EC2 instances as Jenkins agents on demand
In the previous Jenkins in AWS post, we covered installing and running Jenkins on an AWS EC2 instance. Here, we’ll learn how to launch EC2 instances as Jenkins agents (slaves) on demand using the EC2 plugin.
🛡️ Grant Jenkins EC2 Instance Permissions
- Go to AWS Console → IAM → Roles → Create role.
- Select AWS Service and then EC2.
- Attach the AmazonEC2FullAccess policy.
- (Optional) Add tags.
- Name the role (e.g.,
jenkins-ec2-role) and create it.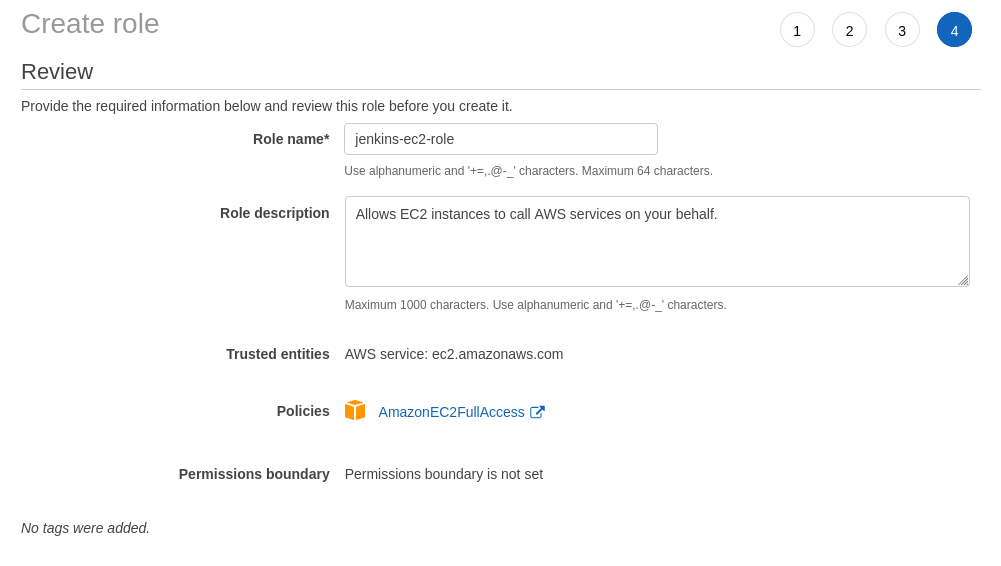
- Attach the new role to our running Jenkins EC2 instance via Actions → Instance Settings → Attach/Replace IAM Role.
🔒 Create Security Group for Jenkins Agents
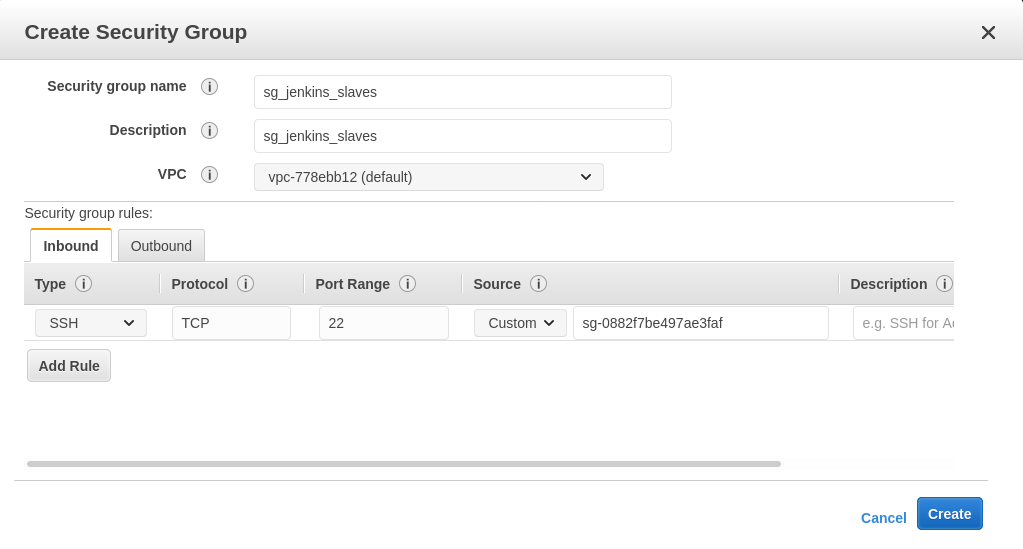
- Go to Network & Security → Security Groups → Create Security Group.
- Name it (e.g.,
sg_jenkins_slaves). - Add an inbound SSH rule, and set our Jenkins master instance’s security group as the source.
🔌 Install and Configure the EC2 Plugin in Jenkins
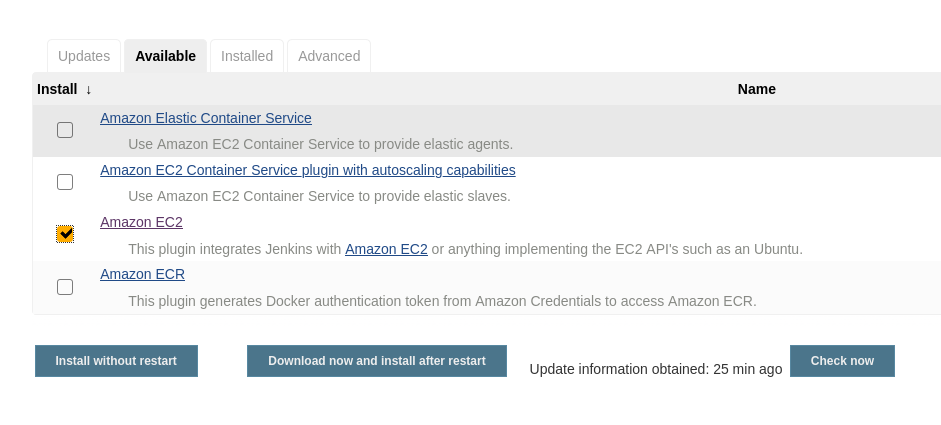
- In Jenkins, go to Manage Jenkins → Manage Plugins.
- Install the Amazon EC2 plugin.
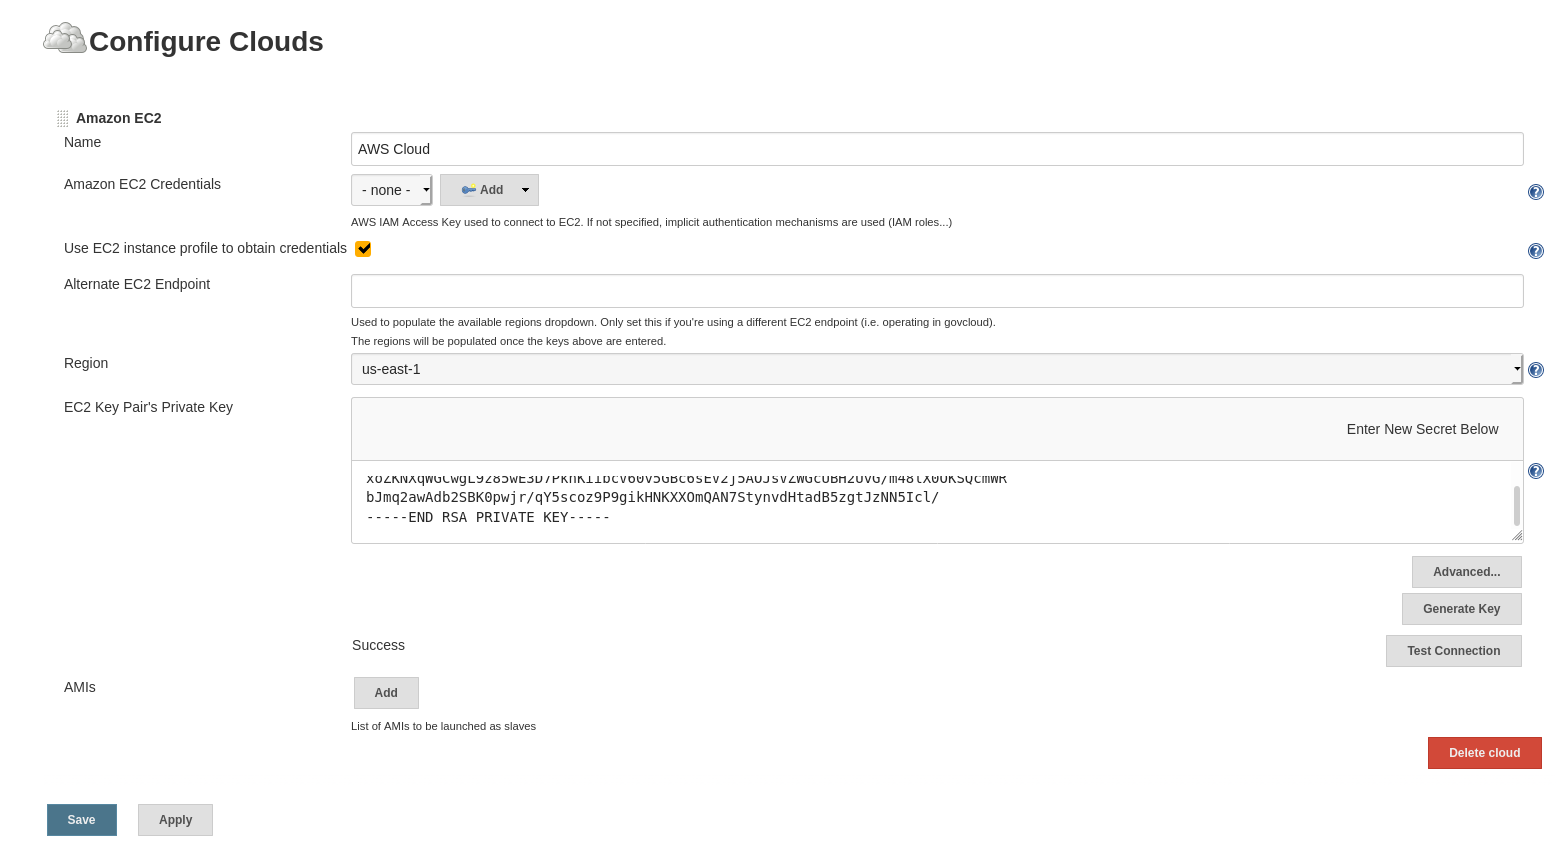
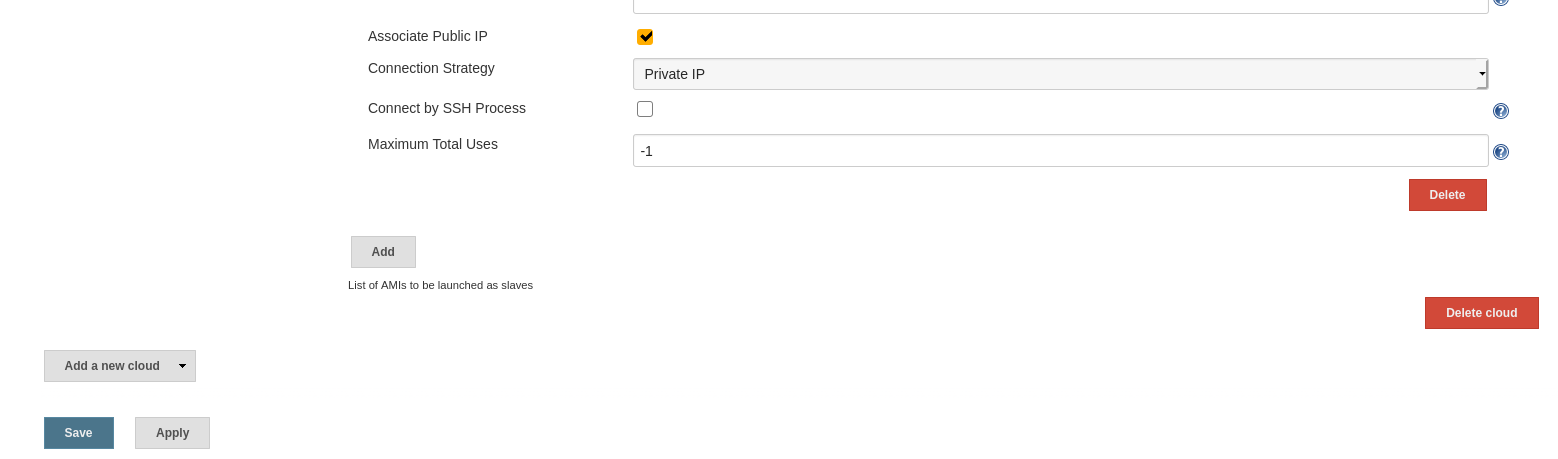
- Go to Manage Jenkins → Configure System → Cloud and add a new cloud of type Amazon EC2.
- Configure as follows:
- Name: AWS Cloud
- Use EC2 instance profile to obtain credentials
- Region: (same as our Jenkins EC2 instance)
- EC2 Key Pair’s Private Key: (our AWS key)
- AMI ID: (same as our Jenkins EC2 instance)
- Instance Type: T2Micro
- Security group names: sg_jenkins_slaves
- Remote FS root: /home/ec2-user
- Remote user: ec2-user
- Labels: aws
- Usage: Only build jobs with label
- Idle termination time: (set as needed)
- Advanced: Associate Public IP

🚦 Use Jenkins Agents On Demand
Once saved, we can use the aws label in Jenkins jobs to automatically launch EC2 agent instances. Idle agents will terminate after the configured idle time.
Comments